Category: Low Carb

Low Carb recipes on Decadently Fit

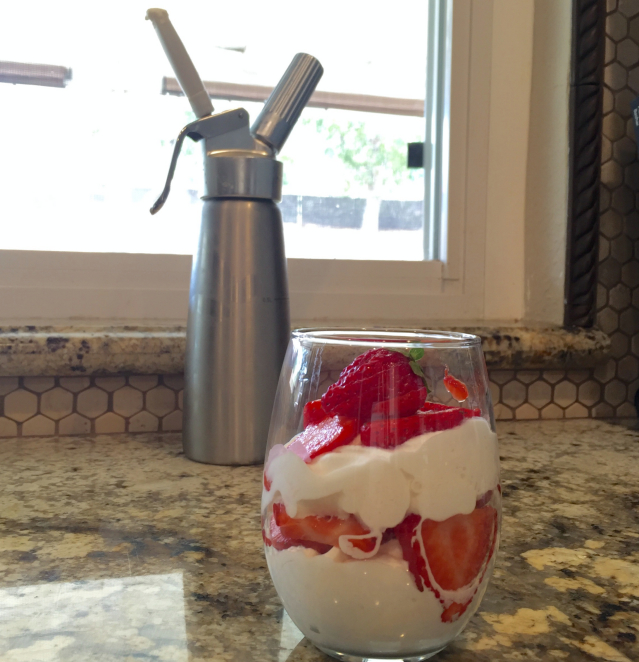
Low Carb Whipped Cream

whipped cream

I’m a sweet junkie.  I’ll never be able to give up sweets no matter what.  I’ve tried and it’s never worked.  So, in order for me to maintain a carb/sugar level that doesn’t make my Fitness Pal scream I have to come up with alternatives.

When I was pregnant with my second son I had gestational diabetes.  It was awful considering I was also on bed rest due to pre-term labor and blood clots.  Every night before bed I had to eat a snack to maintain my blood sugar levels through the night.  Every night my husband/nurse would bring me strawberries and sugar-free Cool Whip.  We figured out it was the perfect carb/sweet amount I needed to maintain my blood sugar and give me the sugar fix my pregnant body was craving.

If you have ever read the ingredient list on a tub of Cool Whip you know that most of the words are extremely hard to pronounce, a.k.a a chemical storm of ‘ingredients’.  Although I was able to keep my sugar levels down with the sugar substitutes I was trading one evil for another.

Fast forward to now.  I have zero time to put together low-fat/low sugar desserts that will quench my insatiable sweet tooth.  Then it dawned on me, if I cut up a ton of strawberries on Sunday and come up with a low sugar, whole ingredient alternative for the whip cream I used to enjoy I would be set.  Then another light bulb precariously teetered above my chemistry and anatomy swollen brain, I have an Isi whip cream dispenser.  That would aid in the instant gratification need.  So, long story short this super simple quick recipe was born.  Yes, you do need a whip cream dispenser, but trust me it’s worth every penny.

Click the whip cream canister image to be directly taken to amazon to purchase!

5.0 from 1 reviews
Low Carb Whipped Cream
 
Author: 
Nutrition Information
  • Serves: 10 servings
  • Serving size: ¼ cup
  • Calories: 76
  • Fat: 7.2
  • Saturated fat: 4.8
  • Carbohydrates: 2.5
  • Sugar: 2.5
  • Sodium: 8
  • Protein: 0
  • Cholesterol: 32
Recipe type: Dessert
Prep time: 
Total time: 
Low Carb Whipped Cream
Ingredients
  • 1 tablespoon honey
  • 14 oz. whipping cream
  • 2 teaspoons vanilla
Instructions
  1. Melt the honey in a microwave safe dish on your melt function or on 10% power for 1 minute or until melted.
  2. Stir in the cream until combined with the honey, add in the vanilla.
  3. Transfer mixture to an Isi whip cream dispense, only filling till max fill line. Screw the lid on tightly then add nitrous canister, screw in tightly.
  4. Refrigerate for 4 hours or until cold.
  5. Shake before dispensing whip cream.


Click the whip cream canister image to be directly taken to amazon to purchase!

Hatch Chili Quinoa Stuffed Zucchini – Plus a Giveaway!

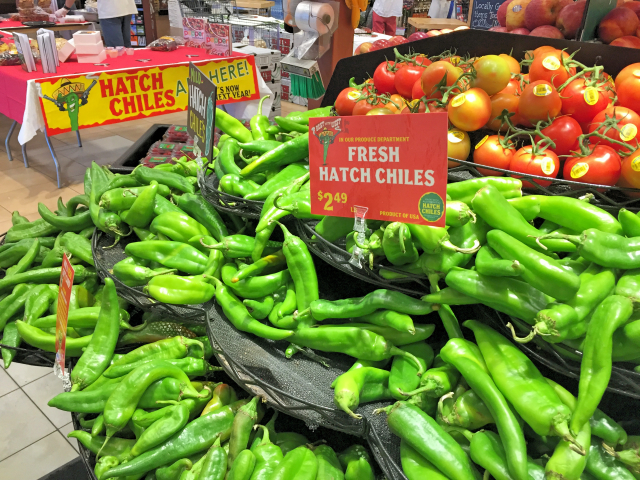
Fresh Hatch Chiles_Fotor If you have been a reader of my blog for at least a year you know about the Hatch Chili.  If not, here is a quick history/biography of the only chili that can be purchased in three different heat scales, mild, medium and hot. a Rafflecopter giveaway

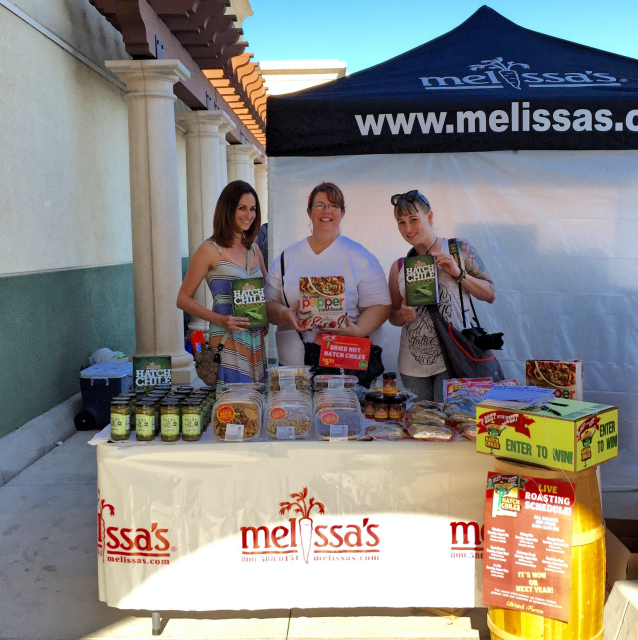
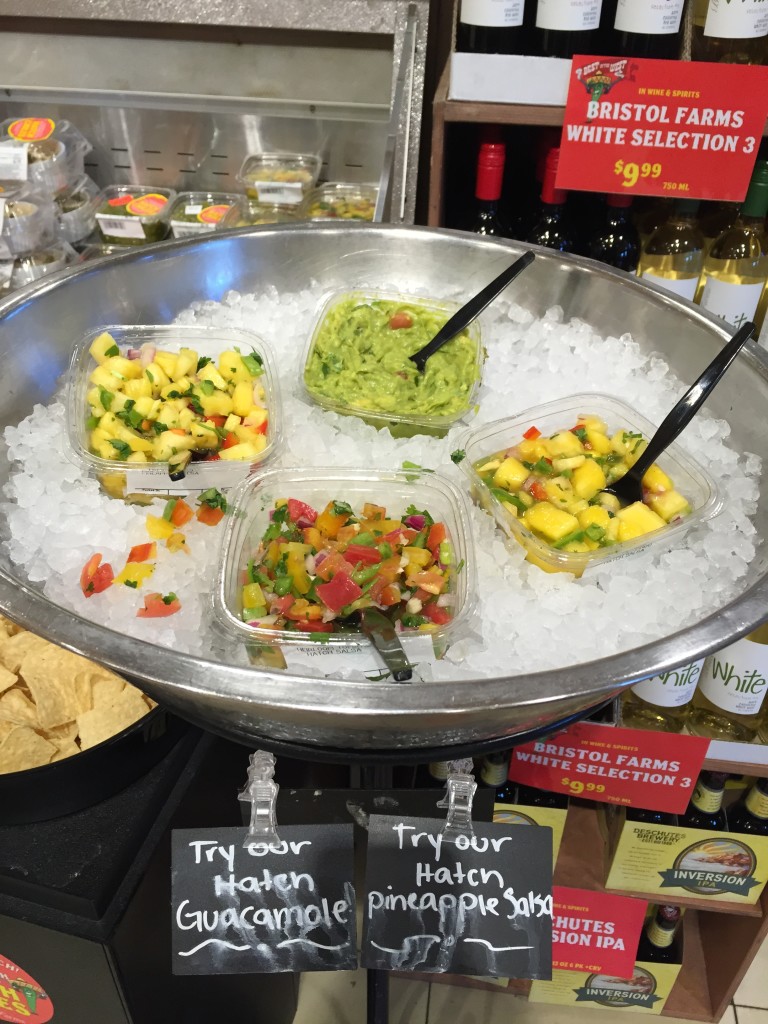
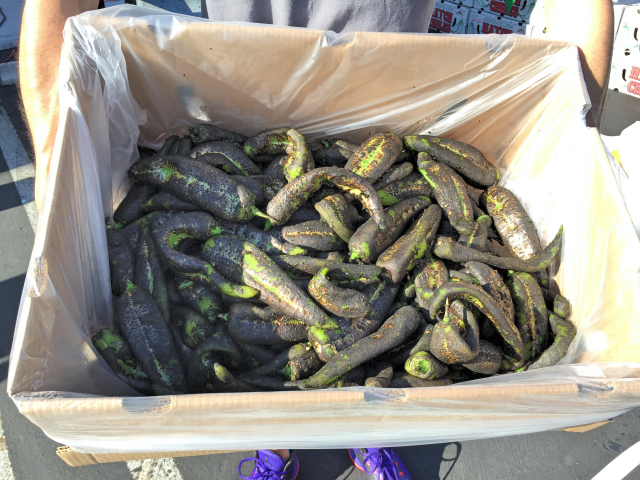
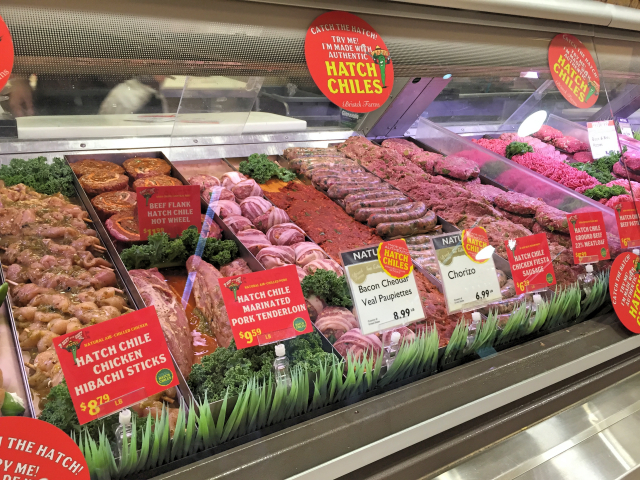
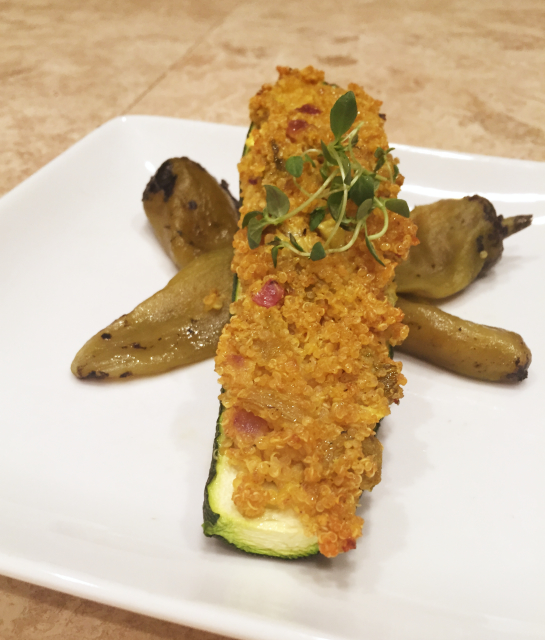
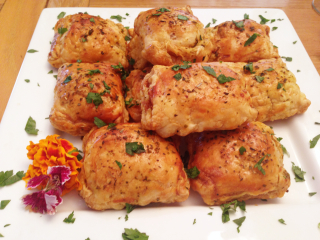
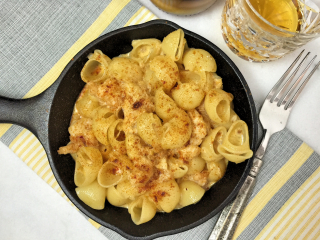
The Hatch Chili has a very short season, which starts in August and ends in September.  They are only grown in Hatch, New Mexico, where the climate is perfect for this species of chili.  The chilies resemble a poblano, but have a deeper flavor.  Whether used roasted, fresh or in powder form the chili goes well with so many flavor profiles. Hatch Chili Roasting IEFB_Fotor The smell of the roasted chills is pretty incredible though.  I should know that scent incredibly well after recently going to a Hatch Chili Roasting event at the Bristol Farms located in Palm Desert.  I was lucky enough to attend with my fellow IEFB friends, Sara from My Imperfect Kitchen and Natalie from The Devil Wears Parsley.  Sue from It’s Okay to Eat the Cupcake was there in spirit with us! Hatch Chili Salsas I tried Hatch Chili everything that day!  From savory dishes like, pizza, sushi, grilled cheese, salsa, macaroni and cheese, guacamole, and chorizo.  My sweet tooth was invited to the party with the juices, smoothies and cupcakes spiked withe versatile chili. Hatch Chilis Roasted_Fotor   I had never been to a Hatch Chili Roasting or a Bristol Farms before.  Both were worth the drive to the desert!  The smell of the hatch chilis wafted through the parking lot when we pulled up and filled the car on our drive home.  We bought a case and split it amongst the four of us.  I would highly recommend doing this.  Since the season is so short it’s one of the only ways to have access to them in the off season.  If you would like to find a roasting near you click here. IMG_3727_Fotor After you have purchased your chills make sure you peel and freeze them within 24 hours of the roasting.  I separated my 1/4 case into smaller freezer bags, flattened them, and stacked them in the freezer.  I left a portion fresh and have been eating them in eggs, soups, meat loaf and then came up with the recipe below with items I already had on hand. Hatch Zucchi_Fotor Hatch Chili Quinoa Stuffed Zucchini is a quick protein filled meal that satisfies.  The mild bite from the mixture of hatch chills and curry powder gives the zucchini a flavorful punch.  Low carb, vegetarian, gluten free, diabetic friendly and tastes amazing.  (recipe below) Want your own Hatch Chili Cook Book from the produce experts at Melissa’s Produce?  Enter to win your own copy here!  You may even win one of the signed copies from the author!
a Rafflecopter giveaway

Here are even more great hatch chili recipes from my friends:

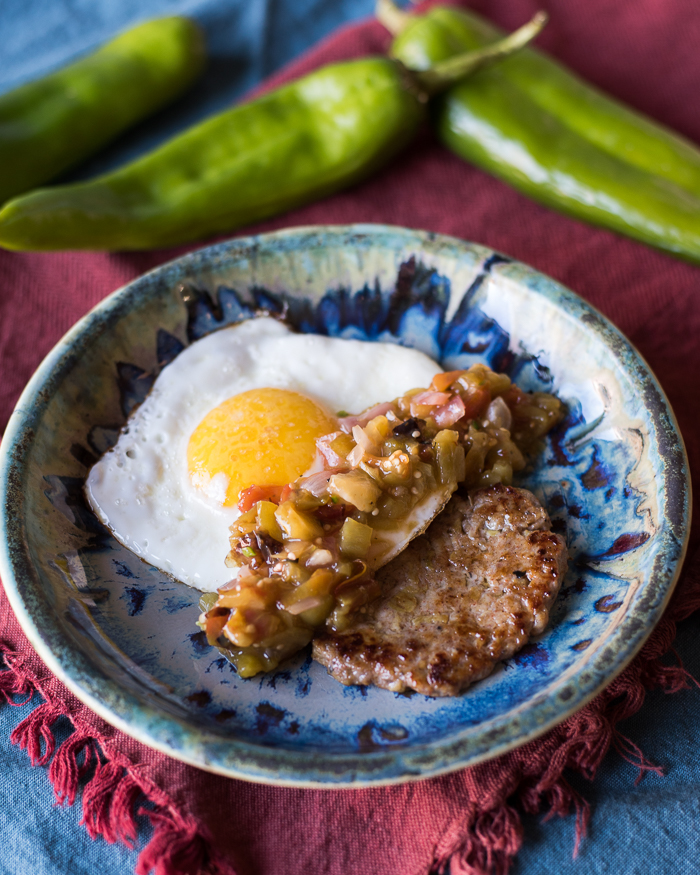
Hatch Chili Breakfast Sausage from Natalie at The Devil Wears Parsley

HatchChileChickenSausage-Natalie

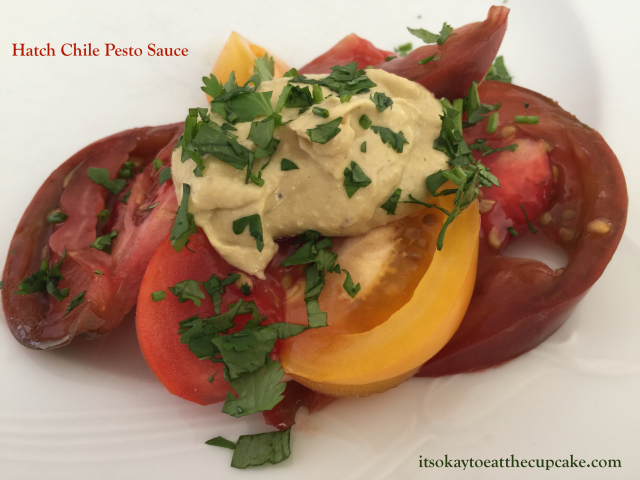
Hatch Chili Pesto from Sue at It’s Okay to Eat the Cupcake

Hatch Chile Pesto Sauce_Fotor

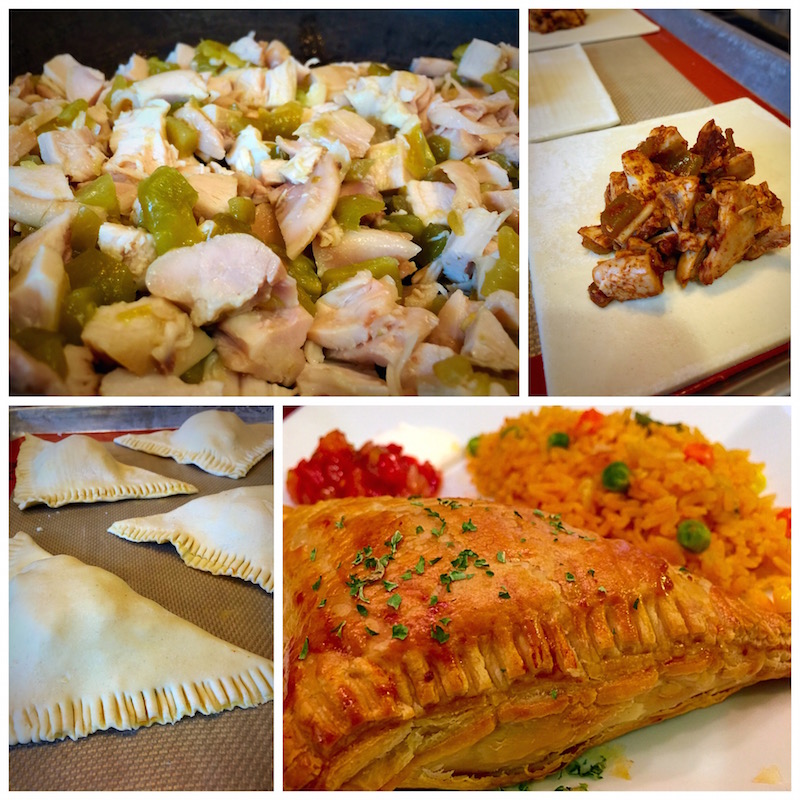
Hatch Chili & Chicken Pockets from Sara at My Imperfect Kitchen

HatchChile&ChickenPuffPastryPockets

4.8 from 4 reviews
Hatch Chili Quinoa Stuffed Zucchini - Plus a Giveaway!
 
Author: 
Recipe type: Main Dish
Ingredients
  • 4 zucchini, split in half
  • 2 cups cooked quinoa
  • 1 teaspoon curry powder
  • ½ cup greek yogurt
  • ½ teaspoon sea salt
  • ½ cup red onion, diced
  • 3 roasted hatch chilis, peeled, and diced
  • 8 tablespoons cheddar cheese (optional)
Instructions
  1. Preheat oven to 350 degrees.
  2. Remove the insides of the zucchini, leaving an edge all the way around the zucchini to hold in the filling. Roughly chop the insides and set aside in a medium size mixing bowl
  3. Saute the red onion in 1 tablespoon olive oil over medium heat for 5 minutes or until translucent.
  4. Add the red onion to the mixing bowl, along with the quinoa, curry, yogurt, salt, and chills. Mix to combine.
  5. Place the zucchini on a cookie sheet, then scoop the quinoa filling into each zucchini boat.
  6. Bake for 30 minutes, then top with cheese if desired. Bake another 5 minutes to melt cheese.
  7. Serve immediately.

 Disclosures:  All opinions in this post are my own.  Bristol Farms did not sponsor this post.  Melissa’s Produce has generously supplied the cookbooks in the giveaway, and hatch chili ingredients.  

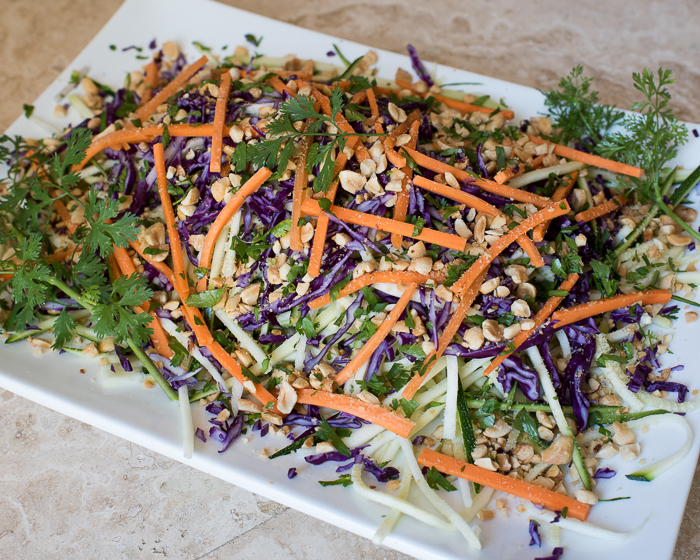
Thai Zucchini Noodle Salad

RebekahSpicyAsianZucchiniNoodleSalad-2
photo credit: Natalie Wiser-Orozco

Sometimes it’s the simplest things in life that make your day.  A smile from someone, a cat purring loudly in your face or even food.  I hate to admit it but food makes my day quit often.  Lately I have been on a tirade with Thai food.

I can not get enough Thai food.  Curry, coconut milk, tamarind, spicy everything.  If I was stranded on a desert island I could eat Thai food the rest of my life.  Oh wait, isn’t Thailand a ton of islands?  I want to be deserted on any one of them.  Now.

In the meantime, I will have to live with making my own at home.

Since the weather has gone from quadrapolar (yes I made that up),  can’t decide what season to be, to I live in an oven hot, cold food is a must.  Cold Thai inspired food equals perfection right now.

Recently my Inland Empire Food Blogger posse came over to share their newest salad creations with me.  I am incredibly lucky to have such talented friends that make to die for food.  I brought this Asian beauty to the table, literally.

My addition was quick, refreshing, spicy, salty and slightly sweet.  You can add grilled chicken to the salad to make it a complete meal.  Whatever you do to this salad just make it.  The dressing is to die for and will quench any Thai cravings you have.  Since it’s low in carbs you can have as much as you want!  Dive in fork first!

Here are the links to the other great salads my friends brought:

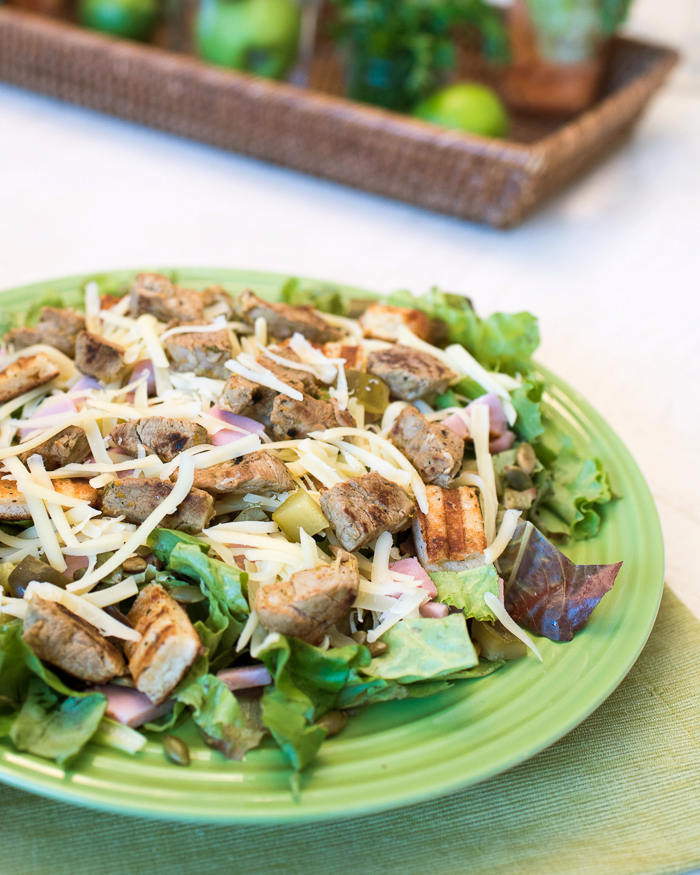
Natalie from The Devil Wears Parsley made a Cuban Sandwich inspired salad.

EnsaladaCubano-14

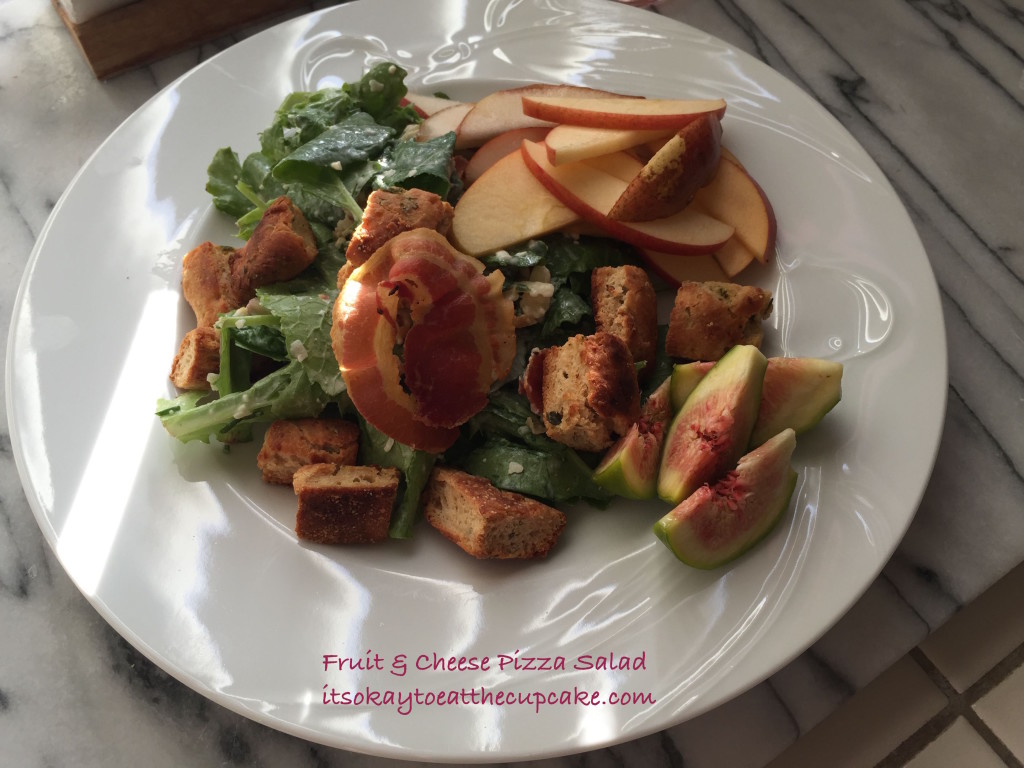
Sue’s Italian inspired Salad from It’s Okay to Eat the Cupcake has home made pizza croutons!

Salad Overhead

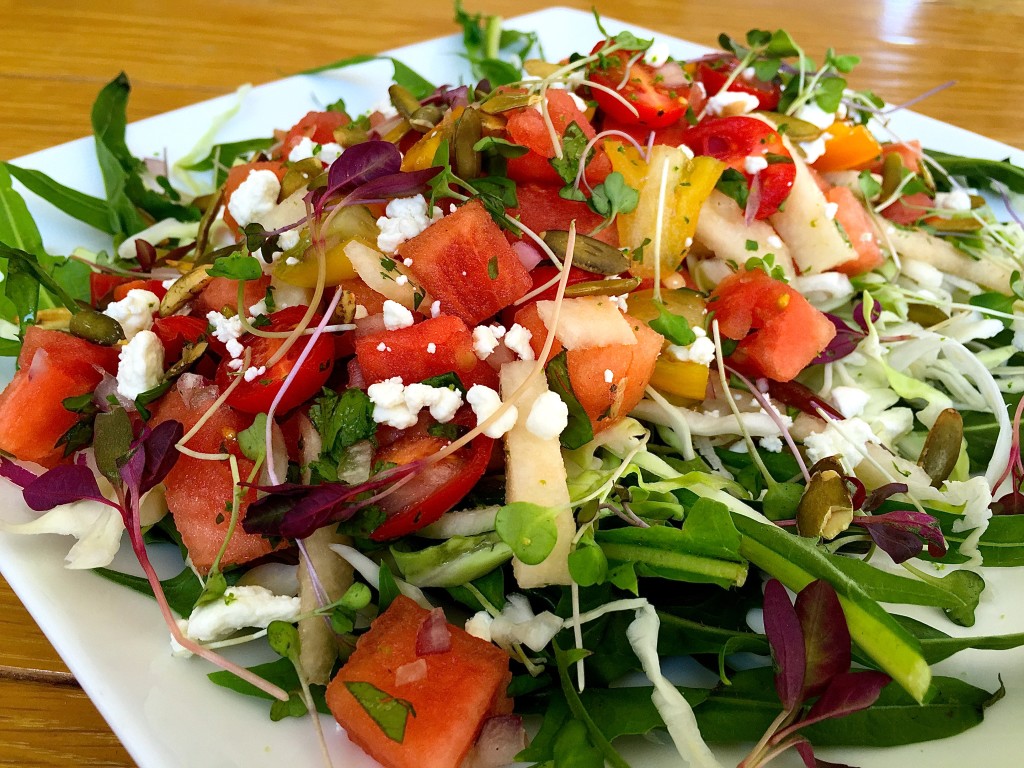
Sara’s baja inspired Spicy Watermelon Salad made my mouth so happy, her recipe is posted on her blog My Imperfect Kitchen:

Sara Salad


Thai Zucchini Noodle Salad
 
Author: 
Nutrition Information
  • Serving size: 
  • Calories: 85
  • Fat: 3.5
  • Saturated fat: .6
  • Carbohydrates: 10
  • Sugar: 6.4
  • Sodium: 414
  • Fiber: 3.1
  • Protein: 3.9
  • Cholesterol: 0
Recipe type: Salad
Cuisine: Thai
Ingredients
  • 3 zucchini, spiralized or julienned into long spaghetti like strips ( I used a mandolin)
  • ¼ head of red cabbage, shredded
  • 1 large carrot, julienned
  • 2 tablespoons chopped cilantro
  • ¼ cup crushed roasted unsalted peanuts
  • grilled chicken (optional)
  • For the dressing:
  • 2 teaspoons fish sauce
  • 2 tablespoons tamari or low sodium soy sauce
  • 1 tablespoon honey
  • 2 cloves garlic, minced
  • ½ teaspoon red pepper flakes
  • 3 tablespoons rice wine vinegar
  • ½ teaspoon ground coriander
  • 1 tablespoon sesame oil
Instructions
  1. Whisk all dressing ingredients together and refrigerate for an hour.
  2. To assemble Salad:
  3. Layer the noodles on the bottom, then the cabbage, the carrots, the cilantro, and then the peanuts. Right before serving drizzle the dressing over the salad. For best results, mix dressing into the salad to coat evenly.


Shepherd’s Pie – Kerrygold Cheese & Butter Giveaway

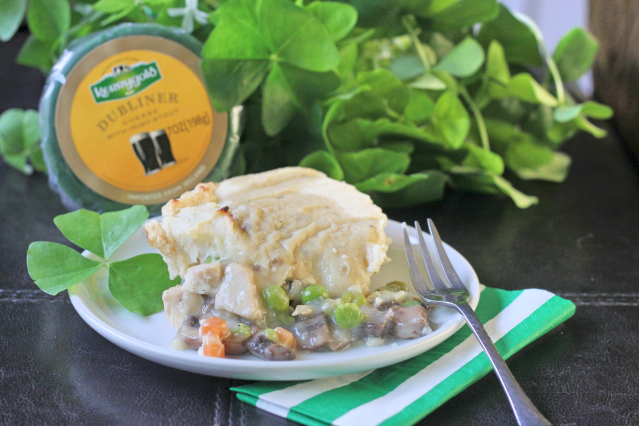
SP Shephards Pie 2_Fotor Top of the morning’ to ya!  Or afternoon, not sure what time of day you are reading this, but this is one recipe you will want to make.  I started making this a few years ago as a solution to a dinner time problem.  One of us wanted healthy, the other wanted hearty.

My gluten-free Shepherd’s Pie became the solution to that problem. Although it’s undergone many makeovers since first conception of the dish, I have settled on this version as my favorite.  The best part is the loaded cauliflower mash that adorns the gluten-free chicken and veggie filling.  The mash is filled with Kerrygold unsalted butter and their Dubliner with Irish Stout.  This Shepherd’s Pie is the perfect healthy St. Patty’s day dinner.

If you read my last post you know that today is the LAST day to enter the Kerrygold Cheese & Butter gift basket worth an estimated value of $175!  Enter below!

a Rafflecopter giveaway

Disclosure:  I was not paid to develop this recipe or to express my opinion.  All opinions are my own.

Shepherd's Pie (gluten free)
 
Author: 
Nutrition Information
  • Serves: 6
  • Serving size: ⅙th
  • Calories: 219
  • Fat: 11
  • Saturated fat: 6.3
  • Carbohydrates: 12.5
  • Sugar: 3.4
  • Sodium: 523
  • Fiber: 2.4
  • Protein: 15.8
  • Cholesterol: 50
Recipe type: Healthy Comfort Food
Cuisine: Irish
Prep time: 
Cook time: 
Total time: 
Slimmed down version of Shepherd's Pie, full of chicken & vegetables, topped with a Dubliner Stout Cauliflower Mash.
Ingredients
  • Cauliflower Mash
  • 1 head of cauliflower, core removed and steamed
  • ⅓ c. crumbled Kerrygold Dubliner with Irish Stout Cheese
  • 2 tablespoons unsalted Kerrygold Butter
  • 1 teaspoon salt
  • ¼ teaspoon white pepper
  • Filling
  • 2 chicken breasts cut into one inch cubes
  • 1 tablespoon Kerrygold unsalted butter
  • 1 shallot, diced
  • 2 garlic cloves, minced
  • 10 ounces baby portobello mushrooms, sliced
  • 1 carrot, diced
  • ½ cup frozen peas
  • 1½ cups chicken broth
  • 1 tablespoon worcestershire sauce
  • 2 tablespoons arrowroot powder
  • 2 tablespoons chicken stock
  • ½ teaspoon dried thyme
  • sea salt and pepper to taste
Instructions
  1. Cauliflower Mash
  2. In a food processor pulse the cheese until it crumbles into very small pieces
  3. add in the rest of the ingredients and puree till smooth. Set aside
  4. Filling
  5. Preheat the oven to 425 degrees.
  6. Melt the butter in a large pot.
  7. Add the mushrooms and a few pinches of salt to the pot and cook on medium high heat for 3-5 minutes, or until the liquid from the mushrooms disappears.
  8. Add the shallots and garlic an sauté for another 2 - 3 minutes, or until shallots are softened.
  9. Add the peas and carrots, stir to combine.
  10. Stir in the chicken broth and worcestershire sauce
  11. In a small bowl stir together the 2 tablespoons of chicken broth and arrowroot till smooth.
  12. Reduce the heat to medium low and combine the arrowroot mixture with the veggie and chicken mixture stirring constantly, cooking for about 5 minutes on low heat until the mixture thickens. Season with salt and pepper.
  13. Pour the veggie chicken mixture into a medium sized baking dish (9X9).
  14. Top the veggie chicken mixture with the cauliflower mash, cover the filling completely.
  15. Bake for 20 -30 minutes or until the mixture begins to bubble.
  16. Let cool for 5 minutes before serving.

Buffalo Blue Cheese Stuffed Eggs – PLUS a Kerrygold Giveaway!

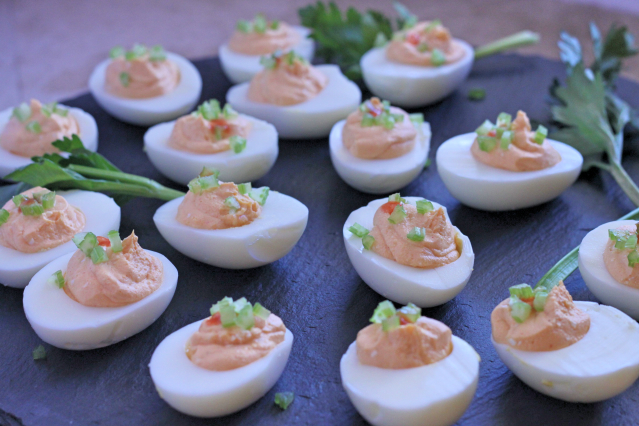
devil eggs4_Fotor 640 Deviled eggs are a pretty popular contribution to Easter celebrations.  Mostly because of the crazy tradition of hiding and finding hard boiled eggs in grass and dirt.  Who started this crazy tradition?  The germaphobe in me cringes. If your household is like mine there is an abundance of hard boiled eggs looking for new uses after the binge eating is over.  There is the obvious egg salad, or as an ingredient in a cobb salad.  My favorite use is the deviled egg. Usually I am a very simplistic lover of the deviled egg.  The less fuss and simpler the ingredients the better, but I love a challenge. I was recently asked to take part of an amazing giveaway with  Kerrygold cheese and butter.  If you have never have a KG product you need to remedy that situation ASAP.  Their products  are made from cows that graze on grass in the hills of Ireland.  Happy cows.  Grateful cows, that make their product with love that you can taste.

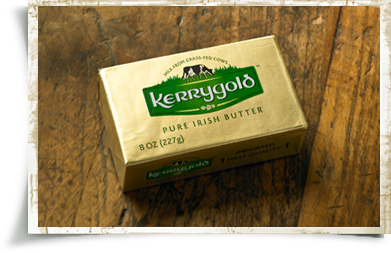
products_butter_salted-butter
photo courtesy of kerrygoldusa.com

I’m sure you are wondering if cows eating grass makes a difference.  I can say empathically that it does.  The old saying “You are what you eat”, not only applies to the cows, but to us as we eat the byproduct of what they eat.  The taste is cleaner than butter and cheese made from a grain fed cow. Not only is the taste better, but there are health benefits to eating the products of grassfed cows.  The butter is yellow in color due to the high levels of beta carotene and is hormone-free.  Did you know that there is a significant amount of Vitamin K2 in the butter made from grassed cows?  K2 is responsible for decalcifying our arteries.  Consuming grassfed butter can lower heart disease, (authority nutrition.com).  

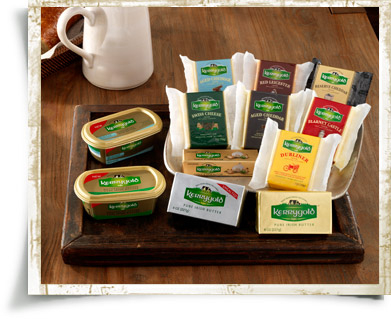
products_landing-intro
photo courtesy of kerrygoldusa.com

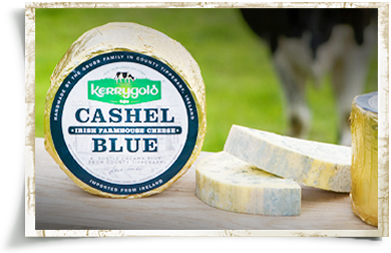
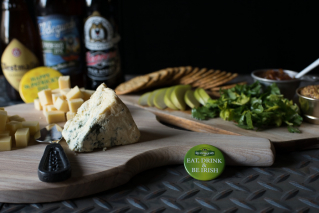
A better question begs to be asked.  Why in the world would you consume anything else?  Especially when you can buy Kerrygold products almost anywhere these days, even Costco. They have some amazing flavors in their cheese line.  From their infamous Dubliner to different types of cheddars, swiss, or the more complex Dubliner with Irish Stout, or Aged-Cheddar with Irish Whiskey and the Irish Cashel Blue Cheese.  Click here to learn more about each cheese.

products_cheese_cashel-blue
photo courtesy of kerrygoldusa.com

After receiving a rather large assortment of happy cow cheeses and butters I was challenged to make an appetizer for our monthly Inland Empire Food Bloggers Meeting.  As a group we are giving away a gift basket of KG cheese and butter valued at $175!  Each of us was asked to come up with a recipe show casing the cheeses. Since Easter is on it’s way, and like I discussed earlier I am always looking for a way to use hard boiled eggs, I came up with this version of deviled eggs.  I guess they should be called buffalowed eggs though.  The eggs are stuffed full of Kerrygold Irish Cashel Blue Cheese.  There is zero mayo in this recipe, using protein packed, tangy greek yogurt instead.  The addition of buffalo sauce in the eggs leaves a spicy finish on the back end.  Diced celery gives the eggs a lovely crunchy texture.  My favorite part of these spicy, cheese filled eggs?  There are only 84 calories for two of these babies. This is what the other members of our IEFB group made with their cheese and butter:

From Sue at It’s Okay to Eat the Cupcake A Dubliner Cream Scone

Single Scone _Fotor

Cottage Pies from Sara at My Imperfect Kitchen

cottage pies_Fotor

Kerrygold Beer & Cheese Pairing from Natalie at The Devil Wears Parsley

KerrygoldCheeseBeerPairing-19_Fotor

Dubliner Judge made by Christy at Confessions of a Culinary Diva

dubliner judge_Fotor

The recipe for the eggs is below, but before I get to that I want to share what is in the Kerrygold gift basket!

2 wedges Kerrygold Dubliner Cheese

2 wedges Kerrygold Swiss Cheese

2 wedges Kerrygold Blarney Castle Cheese

2 wedges Kerrygold Aged Cheddar

2 wedges Kerrygold Reserve Cheddar

2 wedges Kerrygold Red Leicester

2 wedges of Kerrygold Skellig

2 packs Kerrygold Pure Irish Butter

2 packs Kerrygold Unsalted Butter

2 packs of Kerrygold Garlic and Herb Butter

2 packs of Kerrygold Softer Butter

A $175 estimated retail value!

a Rafflecopter giveaway

5.0 from 2 reviews
Buffalo Blue Cheese Stuffed Eggs
 
Author: 
Nutrition Information
  • Serves: 8
  • Serving size: 8
  • Calories: 84
  • Fat: 4.2
  • Saturated fat: 1.4
  • Carbohydrates: .8
  • Sugar: .6
  • Sodium: 241
  • Fiber: .1
  • Protein: 6.5
  • Cholesterol: 164
Recipe type: Appetizer
Cuisine: American
Prep time: 
Cook time: 
Total time: 
A playful, twist on deviled eggs. Cashel Irish Blue Cheese is paired with spicy buffalo sauce and topped with crunchy celery.
Ingredients
  • 8 eggs, hard boiled, peeled
  • 5 tablespoons plain 0% greek yogurt
  • 3 tablespoons Franks Red Hot Sauce
  • ¼ cup Kerrygold Irish Cashel Blue Cheese
  • 5 tablespoons finely diced celery, reserve one for garnish
  • ⅛ teaspoon celery salt
  • cayenne or chili powder for garnish
Instructions
  1. Slice each egg in half lengthwise. Remove the yolks to a medium size bowl, mashing yolks with a fork.
  2. Add in the yogurt, hot sauce, blue cheese, salt, and 4 tablespoons of celery into the mashed yolks. Combine ingredients till smooth, adding more greek yogurt 1 tablespoon at a time until the mixture reaches desired consistency. It should not be too dry, but easy to pipe out of plastic bag.
  3. Scoop the blue cheese mixture into a piping bag or ziploc bag. Pipe about a half tablespoon of the mixture into each egg white half.
  4. Garnish the eggs with remaining celery, and sprinkle cayenne or chili powder on top of each.
  5. Refrigerate till ready to serve. Can be made up to a day before.

Short Rib Ragu over Roasted Cauliflower Steaks

caulifower ragu 6_Fotor 640

Everyone has a signature dish on stand by that they make for the people they love.  A dish that comes from their heart and warms their loved one’s soul.  It’s usually a dish that gave the chef a happy or joyous feeling that they wanted to share.  A silver lining on a bad day.

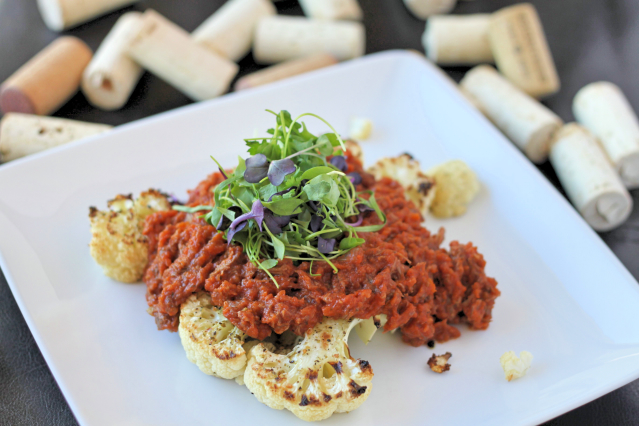
My silver lining dish of choice is a hearty beef ragu.  The first time I had it I was out for a girls night at a local Italian restaurant.  From my first bite I was in love.  That dinner was such a wonderful memory that I have forever tied the luscious flavor with that happy time.  Thus, my love dish was born.

The problem with my love/silver lining dish is that it’s not the healthiest in its original form.  There is a lot of fat laced into and on the outside of boneless beef ribs.  When you braise them the fat melds into every fiber of the meat and sauce.  Yes, it’s to die for, but to make it healthier I pull the outside fat completely off the ribs, leaving only the internal fat.  This cuts down the fat factor immensely.

cauliflower roasted 2_Fotor 640

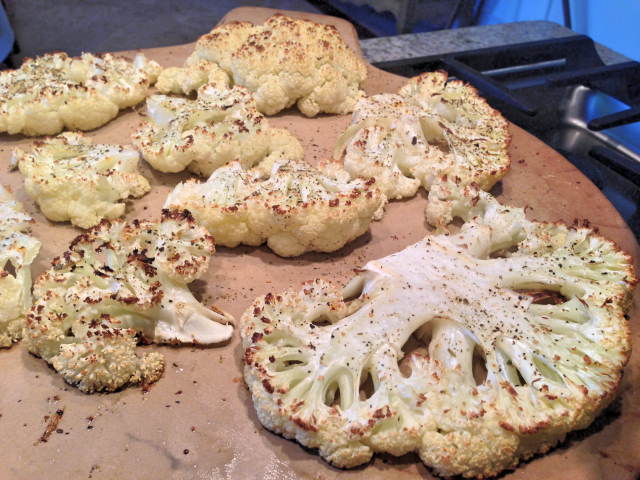
Adding to the unhealthy factor, the original dish was served on a bed of orrechiette (ear shaped pasta).  Although the dish was perfection in this combination, the carbs and gluten aren’t always welcome at my dinner table.  Since cauliflower is one of my favorite cruciferous veggies, I chose to pair the chunky sauce with it.  I roasted olive oil spritzed cauliflower steaks on a pizza stone covered in a garlic herb seasoning.  I didn’t even miss the pasta.  The cauliflower had more flavor and the crunchy texture was a nice contrast to the luscious sauce.

The total meal comes in at only 283 calories.  I have no idea what the original meal nutrition stats are, but I can guarantee they would not be pretty.

Whatever your go to love dish is I hope your Valentines day is filled with love.  Not just on the 14th, but everyday.

5.0 from 1 reviews
Short Rib Ragu over Roasted Cauliflower Steaks
 
Author: 
Nutrition Information
  • Serving size: ⅙th
  • Calories: 283
  • Fat: 11
  • Saturated fat: 5
  • Unsaturated fat: .5
  • Trans fat: .4
  • Carbohydrates: 14.1
  • Sugar: 7
  • Sodium: 855
  • Fiber: 4
  • Protein: 7.4
  • Cholesterol: 22
Recipe type: Main Dish
Cuisine: American, Healthy
Slow Cooked Short Rib Ragu is ladled over roasted cauliflower.
Ingredients
  • For Caulifower Steaks
  • 1 head of cauliflower, washed and patted dry, outer leaves removed
  • Melissa's Produce "My Grinder" Organic Garlic & Herb Sea Salt
  • Olive Oil
  • For Short Rib Ragu
  • 1½ lbs of boneless beef ribs, visible fat removed
  • 1 carrot, peeled and diced
  • 2 celery ribs, diced
  • 1 brown onion, diced
  • 3 garlic cloves, minced
  • 2 tablespoons olive oil
  • 1 teaspoon sea salt
  • ½ teaspoon crushed red pepper
  • 1 tablespoon dried basil
  • ½ cup red wine (I used a cabernet)
  • 1 28 ounce can organic diced tomatoes
  • 1 15 ounce can organic diced tomatoes
  • 4 tablespoons organic tomato paste
  • 2 bay leaves
  • sea salt and pepper to taste
Instructions
  1. For Short Ribs
  2. Pre-heat oven to 325 degrees
  3. Pat the ribs to remove any moisture. Sprinkle with sea salt and pepper on all sides.
  4. Heat a large dutch oven over high heat, then add olive oil when hot.
  5. In 2 batches sear all sides of the ribs. Sear each side for about 2 minutes or until brown. If the meat sticks to the pan when you try to flip it, leave it on for another minute. Remove ribs to a nearby plate after all sides are seared.
  6. Add the onion, carrot, and celery, salt, red pepper and basil to the same pan the ribs were in. Saute for 5 minutes or until soft, stirring occasionally.
  7. Pour in the red wine and scrape all the brown bits off the bottom of the pan (a.k.a. degalze the pan). Reduce the wine by half, about 2 - 4 minutes.
  8. Add the tomatoes and bay leaves, combine well.
  9. Return the meat and the juices to the dutch oven submerging them in the tomato wine sauce.
  10. Put the lid on the dutch oven and cook in the oven for 2½ hours.
  11. Remove the meat from the sauce to a cutting board. Set aside.
  12. Using a hand blender or use a regular blender, pulse the sauce so that the veggies are coarsely pureed. There should be some texture left in the sauce.
  13. Return the meat back to the sauce and stir to combine.
  14. For the Caluiflower
  15. Preheat oven to 425 degrees
  16. Cut the head in 2 inch thick slices. The ends will not come off looking like steaks but you should get at least 2 steaks from one head.
  17. Spray each side of the cauliflower steaks and pieces with olive oil, and then spring both sides with Garlic and Herb Sea Salt.
  18. Place on a pizza stone or baking sheet.
  19. Roast for 20 minutes.
  20. Serve with ragu on top.


Spicy Basil Spaghetti Squash with Sun-dried Tomato

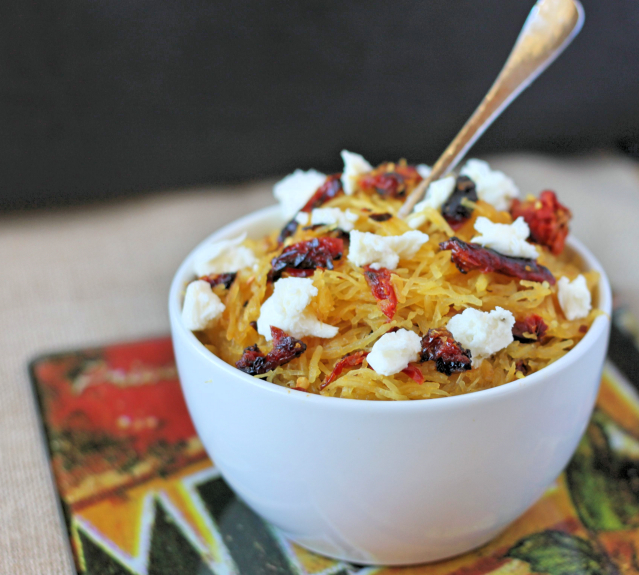
spagetti squash basil oil3_Fotor There are times when cooking dinner is seriously the last thing I want to do at the end of a busy day.  I would rather order a pizza and call it a day.  Ultimately I always regret that decision for many reasons.  First, because of the greasy s@#t storm it creates in my stomach.  Second, because my body just does not do well with that amount of dairy consumed at one time.  It’s a recipe for disaster.  Pun intended. Last night I was scrambling for a dinner idea.  I always keep whole wheat pasta and a jar of organic marinara sauce on hand for emergencies like this.  Only problem is that whole wheat pasta, although great for the boys is not what I want at the end of the day.  I prefer not to eat carbs at a time of day that I can’t burn them. After a quick scan I found a lonely spaghetti squash that was pleading for me to use it.  Normally I would just prepare the spaghetti squash for me, the whole wheat noodles for the kids and use the same sauce for both.  Only problem was that my back up jar had been partially used on tortilla pizzas a couple nights ago.  There was only enough for my two crazies.  So of course I gave them the sauce, the hangrys (hungry+angry=hangry) had already set in. spaghetti squash_Fotor What to do for me?  Fortunately for myself and now beneficial to all of you, I am an advanced pantry recipe developer.  Did you just raise your eye brows and wonder what the heck I was talking about? Basically, I can make something from nothing like nobody’s business.  I attribute it to living on tight budgets for most of my life.  It’s a great skill to possess.

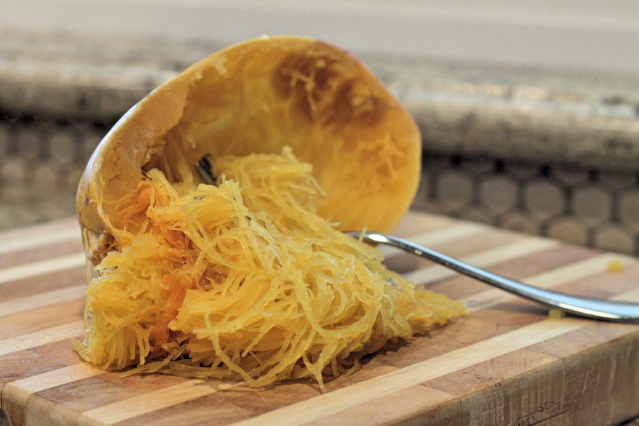
Don’t worry though, as fancy as this recipe sounds, it sooooo simple to make.  Keeping it inline with my new simpler philosophy.  Either bake or microwave the divided squash, then pull the ‘noodles’ out.  Heat the Luna Olivo Basil Olive Oil till shimmering and add a clove of garlic.  Infuse the oil (just let the garlic sit in the hot oil) for a few minutes.  Remove the garlic, add the tomatoes, squash, and red pepper.  Add mozzarella on top.  Done.

You can add chicken or italian sausage for more protein, at that moment I was fine with the mozzarella.  It was quick, tasty, and healthy.  When I made it I served it in the empty spaghetti squash shell, saving me any extra dishes.  Serious bonus, considering I hate dishes. Simple.  Healthy.  Easy Clean up.  Delicious.  All good reasons to have this on standby for your next busy week night.

Disclosure:  I was not compensated for any portion of this post.  Luno Olivo sent me their delicious Basil infused Olive Oil.  I would absolutely suggest purchasing any of their products.  Superb quality, amazing flavor!  Click here to purchase their products.

5.0 from 1 reviews
Spicy Basil Spaghetti Squash with Sun-dried Tomato
 
Author: 
Nutrition Information
  • Serves: 2 servings
  • Serving size: ½ of meal
  • Calories: 319
  • Fat: 17.6
  • Saturated fat: 7.1
  • Carbohydrates: 27.5
  • Sugar: 11.8
  • Sodium: 246
  • Fiber: 6.3
  • Protein: 13.1
  • Cholesterol: 40
Recipe type: Main Dish
Prep time: 
Cook time: 
Total time: 
Simple weeknight healthy dish everyone should add into their rotation.
Ingredients
  • 1 small spaghetti squash
  • 1 whole garlic clove
  • ½ tablespoon Luna Olivo Basil Olive Oil
  • ¼ cup sun-dried tomatoes, not in oil
  • pinch of red pepper flakes
  • 4 oz. of fresh mozzarella cheese
  • pinch of sea salt
Instructions
  1. Prepare the spaghetti squash, one of two ways. 1. For microwave method: Split in half with a sharp knife. Place face down on a microwave safe plate. Pour ¼ cup of water on the bottom of the place and cover with plastic wrap. Microwave for 8 minutes. Let sit for 5 minutes. Remove from microwave with hot pads. With a fork pull the 'noodles' out of the squash. set aside. 2. For oven method: Split in half with sharp knife. Place face down on a foil covered baking sheet. Bake at 450 degrees for 30 -40 minutes until flesh can be pierced with a fork easily. Remove from oven and let cool till it is easy to handle. Remove 'noodles' from squash, set aside.
  2. Add the olive oil into a hot large sauté pan. Put the clove of garlic in the pan and let the garlic infuse the oil by swirling it around the oil for 2 - 3 minutes. Remove the garlic.
  3. Add the tomatoes and the red pepper flakes to the oil and sauté for 1 - 2 minutes.
  4. Add the spaghetti squash to the pan. Saute for 2 minutes and add salt. Toss the squash with the ingredients, then remove to two separate plates.
  5. Top each plate with half of mozzarella. Serve immediately.


The Big Book Of Sides – Cookbook Review – Whole Roasted Cauliflower

cauliflower_Fotor

This is the time of year I spend hours scouring the internet looking for the most impressive side to impress our relatives with at holiday gatherings.  Half the time I get distracted on Pinterest looking at other things besides a mouth-watering side.  Hours later I have nothing to show for it.

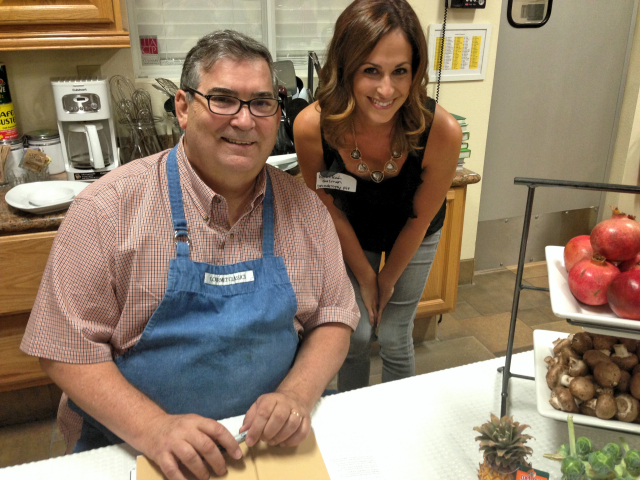
A couple of weeks ago I attended a cookbook release event at the Melissa’s Produce test kitchen in Vernon, CA.  The Big Book of Sides by Rick Rodgers was presented to an entire room of hungry bloggers.  We were treated to several recipes from the book, prepared by Melissa’s amazing chefs.  Life as a food blogger does not suck.

bekah rick_Fotor

Rick is an Award winning cookbook author of more than 40 cookbooks.  This isn’t his first rodeo. His past experience has helped create an impressive collection. This compilation of inventive and traditional sides is the only place I will need to look when trying to impress the relatives.

There is something for everyone from stuffing and gravy to homemade green bean casserole and macaroni and cheese.  There are healthy sides and decadent comfort foods.   Even homemade dressings and step by step instructions to the perfect risotto.  If you have any occasion you need to bring a side dish for this book covers it all.

Among the dishes we were served was:

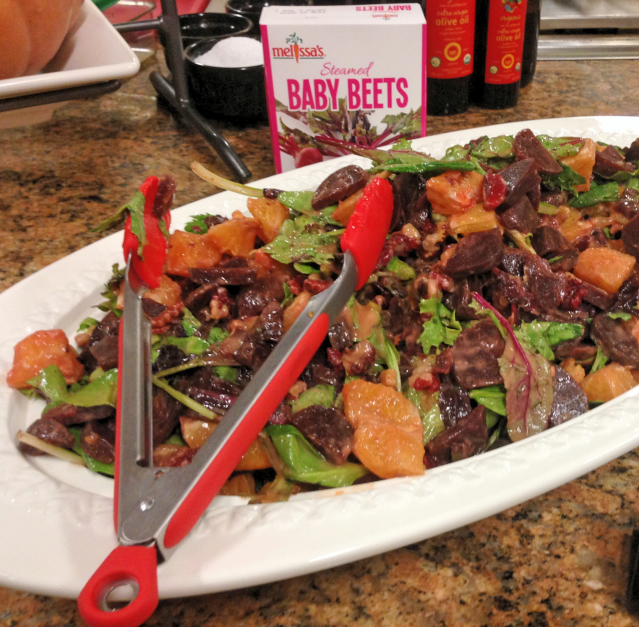
Roasted Beet and Orange Salad

beets_Fotor

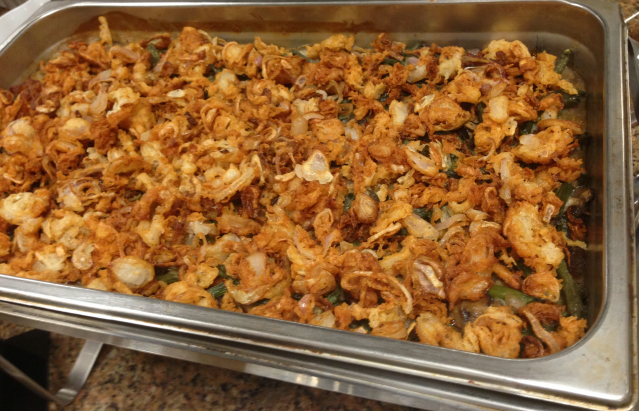
Homemade Green Bean and Mushroom Casserole with Crispy Shallots

green beans_Fotor

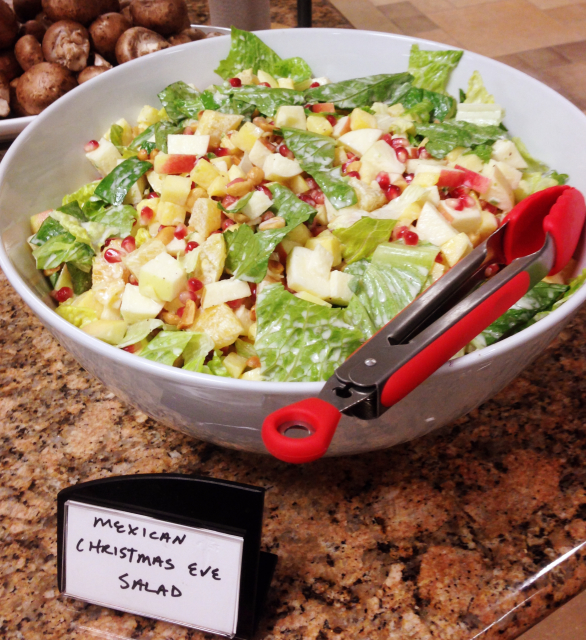
Mexican Christmas Eve Salad

christmas salad

Also on the menu was Roasted Brussel Sprouts with Bacon and Maple Syrup, Butternut Squash and Potato Gratin, and Ricks perfect Gravy.  When I say perfect, I mean perfect.

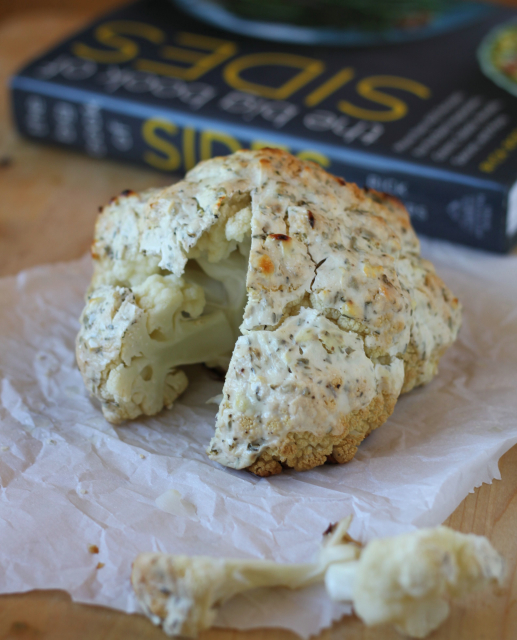
One of the recipes that jumped off the page and into my kitchen this week was the Whole Roasted Cauliflower with Za’tar Crust (page 67).  Not only would this make a great holiday side, but it is a fast, easy, tasty middle of the week side.  Middle eastern spices mixed with greek yogurt create an almost parmesan like crust over the entire cauliflower head.  If you haven’t decided what to bring to Thanksgiving dinner bring this.  As the description in the book says, “It’s a show stopper!”.  Below you will find the recipe card for this show stopping side dish.

To add this wonderful book to your collection you can click here or on the image below.  The book would make a great Christmas present for anyone who loves to cook or is learning to cook.


Disclosure:  I was not compensated for any portion of this post.  The book was given to my courtesy of Rick Rodgers cookbook launch event.  All opinions are my own.  My opinion is that you should click the link above and get this book into your hot little hands now.  :)

Whole Roasted Cauliflower with Za'tar Crust
 
Author: 
Nutrition Information
  • Serving size: ⅛ of the head
Recipe type: Vegetable, Side dish
Cuisine: Middle Eastern
This is a show stopper- an entire head of cauliflower roasted with a yogurt topping to a golden brown turn. For such a simple dish, it gets points for its dramatic appearance and complex flavors.
Ingredients
  • ¾ cup low-fat plain yogurt (I used greek)
  • 1 teaspoon dried oregano
  • 1 teaspoon dried thyme
  • 1 teaspoon sesame seeds
  • 1 teaspoon ground sumac
  • 2 garlic cloves, crushed through a press
  • 1 teaspoon kosher salt
  • ½ teaspoon freshly ground pepper
  • 1 head (about 2 lbs) cauliflower, green leaves trimmed
Instructions
  1. Position a rack in the center of the oven and preheat the oven to 400 degrees. Line a rimmed baking sheet with parchment paper or foil.
  2. In a medium bowl, whisk the yogurt, oregano, thyme, sesame seeds, sumac, garlic, salt and the pepper until smooth. Stand the cauliflower on the baking sheet and spread the yogurt mixture all over the top and sides.
  3. Roast until the topping is deep and golden brown and the cauliflower is tender when pierced with a long, thin knife, 50 minutes to 1 hour. Cut the cauliflower into wedges and serve.

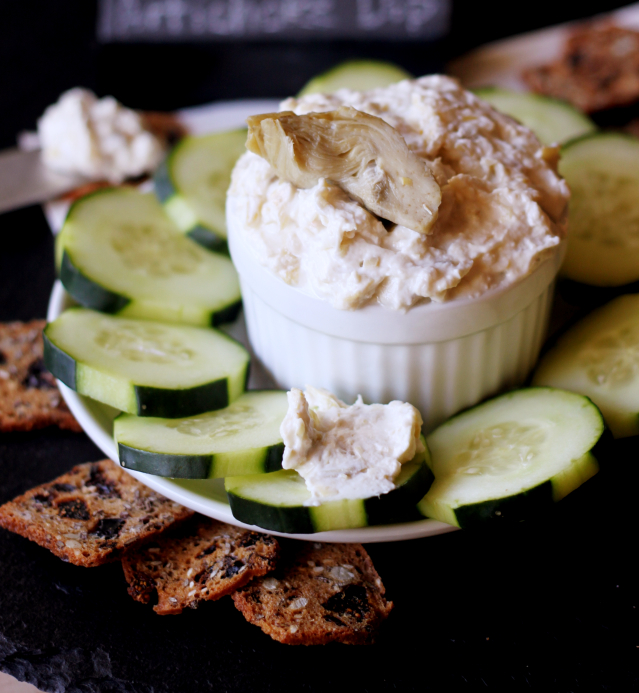
Artichoke Goat Cheese Dip


artichoke dip12_Fotor resize
It’s that time of year again.  Football season has made its way into almost every American home.  That means it’s also the time of year where winter weight starts appearing.  Game day food is the culprit for much of the winter weight football lovers and haters gain.  I added ‘haters’ or shall I say I ‘could not care lessers’.  Unless it is USC, I could care less.  So how is it that I can still gain weight during this ‘football widow’ season?  I would rather eat than watch the game.

Before everyone starts giving me a hard time, I have tried to get into football for my husband’s sake.  He’s tried teaching me.  We even did our own Fantasy Football League one year.  I lost interest half way through and admitted defeat.  It’s just not my thing.  Trying to figure out who is injured, who is good/bad, and ugly is a lot of work.

So what is a girl to do that doesn’t want a fatty winter coat?  Bring healthier options.  Lets face it, most people don’t care or think about healthier options when football is involved.  So you are going to have to do it yourself.  Or not.  There is a quote that I love, “Summer bodies are made in the winter”.  Keep that in mind as you attend a multitude of game day parties.

strawberry hot wings

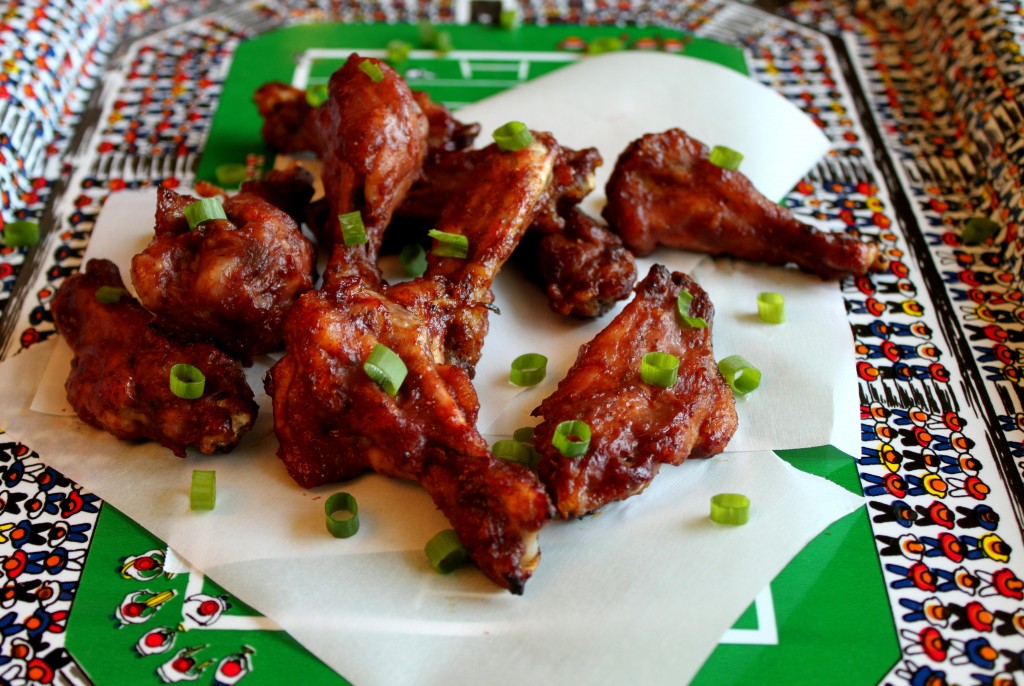
Options, they are plenty.  You can always go with a standard crudite platter (veggies and dip) but I like to fancy up my apps.  You can’t go wrong with my baked Strawberry Hot wings.  Or my Assyrian family recipe for Jajic dip.  But I’d like to introduce you to an upscale, lightened version of the artichoke dip.  I call her Artichoke Goat Cheese Dip.

This spicy, creamy, yet chunky dip is everything I look for in a crowd pleasing appetizer.  I combined lightly caramelized shallots, with garlic, red pepper flakes and a touch of sea salt. Then added the savory combination to goat cheese and 0% greek yogurt.  As if the mixture wasn’t already to do for, I added in chopped artichoke hearts.

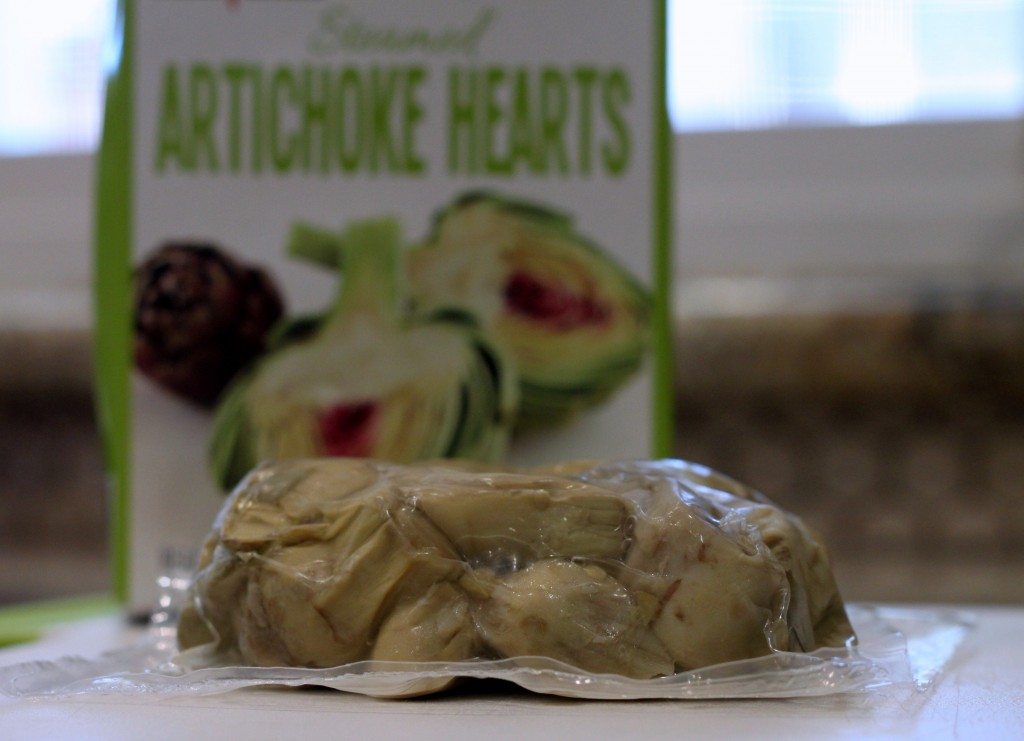
I feel compelled to share with you my newest find in the realm of already steamed artichokes.  Raise your hand if you hate veggies in a can.  I raised both, because I hate them that much.  Canned veggies contain added salt, BPA, and sulfites.  Nothing you want in your body if you are trying to eat clean.

artichoke dip8

Melissa’s Produce has recently come out with a new way to buy cooked artichokes.  No cans!  The artichokes are steamed then vacuumed sealed and packaged in a cute little box. No nasty chemicals to rinse off.  What I loved the most about the product is there is no chemical after taste, just pure artichoke goodness.  I measured out over a cup of artichoke hearts in the package.  Due to the lack of liquid in the packaging the weight is all artichokes!

I only used half the package in the dip.  I have scrumptious plans for the other half.  Stay tuned.

Disclosure:  I was not compensated for this post.  All opinions are my own.  Artichokes were provided by Melissa’s Produce.  

5.0 from 1 reviews
Artichoke Goat Cheese Dip
 
Author: 
Nutrition Information
  • Serves: 16
  • Serving size: 2 tablespoons
  • Calories: 32
  • Fat: 2.1
  • Saturated fat: 1.2
  • Carbohydrates: .8
  • Sugar: .5
  • Sodium: 106
  • Protein: 2.5
  • Cholesterol: 3.3
Recipe type: Appetizer
Prep time: 
Cook time: 
Total time: 
The perfect solution to your unhealthy game day options. A lightened up, upscale version of traditional artichoke dip.
Ingredients
  • 1 tablespoon Earth Balance Butter or Olive Oil
  • 1 large shallot, sliced
  • 2 garlic cloves, smashed (I used the bottom of a glass)
  • ½ teaspoon fine sea salt
  • ¼ - ½ teaspoon red pepper flakes
  • 4 oz plain goat cheese
  • ⅓ cup 0% plain greek yogurt (I like Fage)
  • 1 cup Melissa's Steamed Artichoke Hearts, chopped
Instructions
  1. In a small saucepan heat the butter or oil
  2. Over medium-low heat sauté the shallots, garlic cloves, salt, and red pepper till the shallots turn a golden brown color. About 10 -15 minutes. Do not over cook them. Remove from heat and cool.
  3. In a medium sized bowl, using a fork, smash the goat cheese with the yogurt till combined. Fold in the artichoke hearts.
  4. Add the cooled shallot mixture into the goat cheese mixture, cover and refrigerate for at least 4 hours.
  5. Serve with sliced cucumbers or Fig and Olive Crackers from Trader Joe's. They are delicious!


Paleo Carrot Cake & Throwdown {$50 gift card giveaway}

carrot cake slice feature1

{giveaway has ended}

Spring has officially sprung, the signs are everywhere.  Birds are busy building their nests.  The intoxicating smell of blooming flowers is in the air.  All of this means that Easter is on it’s way!  Not only do I love this holiday for spiritual reasons, but for the candy, cakes, and sugar.

My name is Rebekah and I am/was a sugar-a-holic.  Even though I have cleaned up my diet tremendously, this is the area I still struggle.  If there is a Reese’s Peanut Butter Egg within 5 feet of me, I will seek and destroy.  It’s embarrassing to be caught shoving said egg in your mouth by your 5 year old.  The yellow wrapper and chocolate lining my lips didn’t help.  Sorry C-Bear, I owe you.

My addiction to sugar is so bad that I gave it up for Lent this year.  What is Lent?  Christians & Catholics use this time of year to give up anything that may take their focus away from God.  It symbolizes the sacrifice that Jesus made for us.  So for 40 days we try to simulate a sacrifice.  For me that means 40 days without processed sugar.

The Lent period starts Ash Wednesday and ends on Easter Sunday.  There have been serious temptations sent my way, but I have stood firm against the sugar demons.  Don’t worry, those peanut butter eggs don’t stand a chance on Easter.  Hide your eggs, hide your chocolate, I’ll be on a mission to give my self a horrible stomach ache.  Then I won’t want to touch it for at least a day, maybe day and a half.

carrot cake whole 1

Another favorite spring time treat of mine is carrot cake.  I can’t resist the buttery, sweet, carrot filled, cream cheese topped cake.  In moderation it wouldn’t be so bad, but I don’t know anyone who is satisfied with a small sliver of the carrot-filled goodness.  I want a satiating piece.

Wanting a satiating piece of carrot cake was one of the reasons I started conjuring  up a healthy version. Giving up processed sugar was the biggest reason.  This was truly a passion project.  It took many tries to get it right, but I am truly proud of the finished project.  You will not find any ounce of processed sugar or grains in this paleoan beauty.  All you gluten-free lovers can eat this proudly.  Vegetarians, you can enjoy this freely.   Clean eats all the way.

The sweetness in the cake comes from a mixture of dates, pineapple, and carrots.  I used Bob’s Red Mill Hazelnut Flour and Coconut Flour for the base.  Then added in Bob’s Arrowroot starch to stabilize the cake. To frost this luscious grain-free goodie, I blended together coconut oil and pure maple syrup.  I know it sounds strange, but it is out of this world good.

It’s hard to tell that this is a healthy version of the naughty nosh.  This cake would be the perfect end to your Easter dinner.  Or any dinner you choose to serve this season.

If you are looking for the best decadent, playful versions of carrot cake, check out my friends Jillian, Barbara, and Angela’s recipes.

After you check them out, enter to win a $50 gift card to the store of your choice!  You can enter multiple times by following each of our social media outlets.  Click the link below to enter!

carrot_cake_cheesecake_cake
Jillian’s Bakery Style Carrot Cake Cheesecake Cake from Food Folks & Fun
carrot-cake-brownie-bars-feature
Barbara’s Carrot Cake Brownie Bars from Barbara Cooks
ang carrot cake
Angela’s Rainbow Carrot Cupcakes from Aloha: Yinz Mangia
carrot cake slice feature1
Paleo Carrot Cake from Decadently Fit

Enter giveaway by clicking rafflecopter link below!

a Rafflecopter giveaway

_______________________________________________________________________

Paleo Carrot Cake

Serves 16

Cake

12 dates, chopped

1 1/2 cups boiling water

1 teaspoon baking soda

1/2 cup chopped pineapple, packed

3 cups carrot, finely shredded

6 tablespoons Melt Buttery Spread (or other vegan butter), melted

4 eggs, room temperature

3/4 cup Bob’s Red Mill Hazelnut flour

1/2 cup Bob’s Red Mill Coconut flour

1/4 cup Bob’s Red Mill Arrowroot starch

4 teaspoons cinnamon

1 teaspoon nutmeg

1/2 teaspoon fine sea salt

1 teaspoon baking powder

1 t. baking soda

2 teaspoons vanilla

Frosting

6 tablespoons pure maple syrup

1/2 cup room temperature coconut oil (do not melt)

Cake

Pre-heat oven to 350 degrees.

Prepare a 9 inch spring form pan by greasing the sides and bottom with Melt, and cutting a parchment paper circle to fit the bottom of the pan.

Combine the dates, boiling water and teaspoon of baking soda.  Set timer for 10 minutes.

After time is up, use a fine strainer to remove dates from mixture.  Pulse dates 1 minute in food processor.  If the mixture is too thick to pulse, use 1 tablespoon of orange juice at at time to make it easier.  Do not liquify the mixture, it should still be somewhat chunky.

In another bowl, combine the flours, cinnamon, nutmeg, salt, baking powder and baking soda together.

In a large mixing bowling, whisk eggs till frothy.  Whisk in the Melt slowly.   With a wooden spoon mix in the dates, then the pineapple, carrots and vanilla.

Combine the wet mixture with the flour mixture till everything is incorporated well.

Pour batter into spring form pan and cover with foil.

Bake for 30 minutes, then remove foil cover and bake for another 30 – 40 minutes, or until cake is done.  It will be done when middle of cake springs back to gentle touch.

Frosting

With an immersion blender or high power blender combine the two ingredients till smooth.  Frost the cooled cake and enjoy.

Cake can be store at room temperature up to 3 days.


Servings: 16• Size: 1/16 Calories: 248• Fat: 15.5g • Carb: 25g • Fiber: 3.4g • Protein: 3.4g • Sugar:  18g Sodium: 222mg • Cholesterol: 53mg